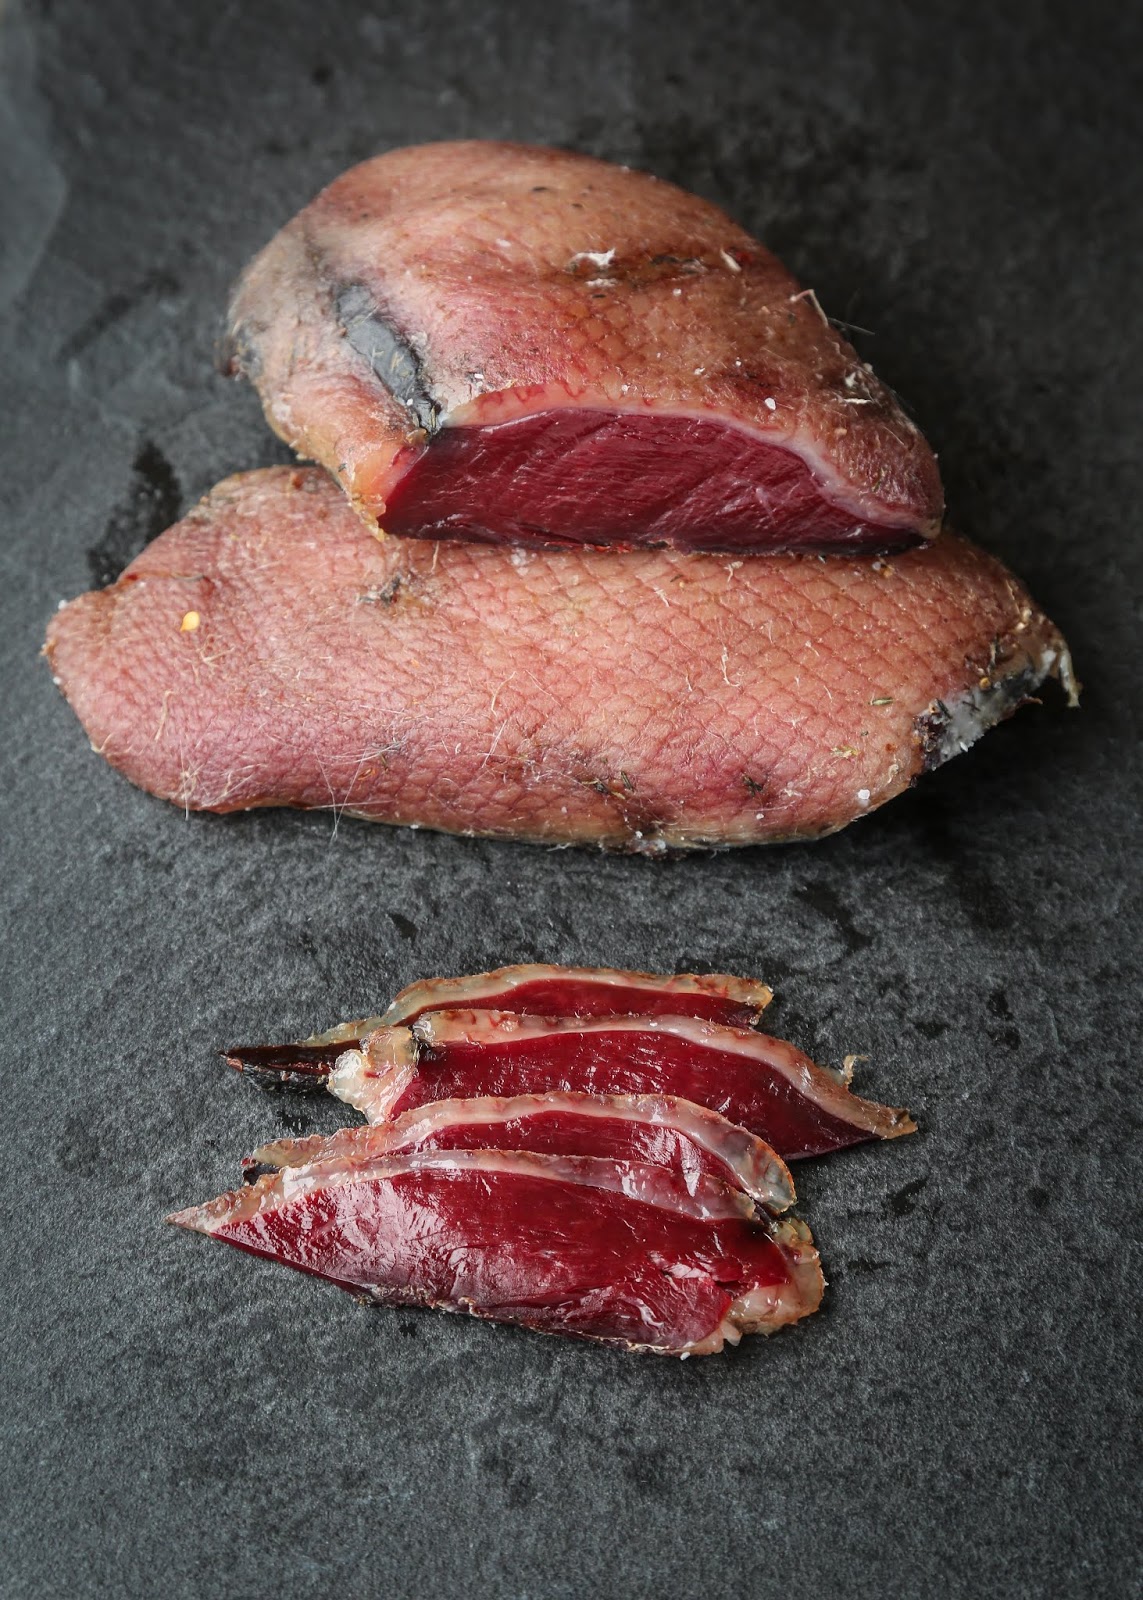
Goose Prosciutto
First of all, I'm not trying to reinvent the wheel here. This post is based on Hank Shaw's duck prosciutto recipe, which he has outlined on his website: https://honest-food.net/duck-prosciutto-recipe/
Instead, this post includes our notes, mistakes and troubleshooting in our attempt to make Canada goose prosciutto in our less-than-ideal meat curing space, which we also call our garage. Take everything we write here with a grain of salt: follow your nose and consume at your own risk. I would read Hank's recipe first.
Although there are risks, duck/goose prosciutto is not difficult to make. There's little active prepping, but it will require patience and some devotion. The result is a wild, deeply-flavorful item of charcuterie that would make any meat and cheese board special.
So far and to our palates, this has been the best treatment for Canada goose breast. They're not at the top of our list of "best" wild game meats to eat. The flavor is okay, but the breasts are a bit too tough for the table. As prosciutto, however, the taste and look of cured Canada goose breast can be truly sumptuous.
Prep Time: 3-7 weeks
Ingredients: Exact measurements discussed in directions.
- 2 Canada goose breasts
- Kosher salt
- No. 2 curing salt
- 1 tablespoon of sugar
- Pork lard
- 1/2 teaspoon of dried thyme
- Red pepper flakes, to taste
- Red wine vinegar
Special equipment:
- Cheesecloth
- Kitchen twine
- Vacuum sealer and bag
- Cooling rack
- Food scale
How to Make Goose Prosciutto
1. Weighing Out Salt and Curing

Weigh both breasts in grams. Take that number and calculate 2% (.02) for salt and .3% (.003) for No. 2 curing salt.
Our two Canada breasts weighed 867 grams total.
2% of 867 grams is 17.34 grams– that's how much kosher salt we needed.
.3% of 867 grams is 2.601 grams– that's how much No. 2 curing salt we needed.
These amounts will seem scant, but it will work out. Combine the measured salt, curing salt, 1 tablespoon of sugar, 1/2 teaspoon of thyme and red pepper flakes in a small container/bowl. Pat goose breasts dry with paper towels and sprinkle the curing mixture all over both breasts, as evenly as you can.
Place breasts inside a vacuum seal-able bag and seal. This is called an equalization cure. Place goose in the refrigerator to cure for 1 week.
2. Removing the Cure and Drying

After 1 week, remove the breasts from the bag and wash off the cure, including most of the thyme and red pepper flakes. Pat them dry with paper towels, and then set them on a cooling rack to air dry further for a couple hours. It's okay to leave them on the counter at this point.
3. Coat with Lard to Prevent Case Hardening

To prevent case hardening, I contacted Chad Lebo, our local "meat guy." Chad owns a meat shop called Cure in Fort Calhoun, Nebraska, and has a passion for curing meats– hence the name of his shop. Areas where the goose breasts were covered in skin/fat would be fine, but to protect the exposed areas, Chad instructed me to coat the meat side with lard.
We keep lard on hand in our freezer. We shaved off a few flakes and allowed the pieces to soften at room temperature before using. You will not need a lot of lard. Cover all areas of the breasts not protected by the skin with a thin layer of lard.
Forgo this step if you have ideal humidity.

4. Hanging
If possible, hang the breasts out in the open as Hank described: poke a hole into one end of the skin on each breast and hang from a food-grade S hook. This will allow better air circulation and help you catch mold before it takes hold– something we had issues with, more later.However, if you're worried about dust and debris in your garage, as we are, it's possible to hang the breasts wrapped in cheesecloth. We hung them from the holes in our garage door railing. Remember that when wrapped, though, it can be a pain to visually check the meat.

Cut two squares of cheesecloth big enough to loosely hold one breast. Take one sheet and gather the four corners together; cut a hole through all four layers and secure with kitchen twine; cut the twine long enough for hanging as well. Repeat with the second sheet.

Place one breast into each "sack." The openings on the sides should be large enough that you can easily see and get to the meat.
Hang them in a dark place that is between 40-60° F, preferably in an area where curious pets, varmints and children cannot reach, but conveniently low enough that you can easily check on them. Fortunately for us, our garage stays at about 50°F year round.
Hang for at least two weeks, but if you're comfortable, hang for a month for better flavor. We ended up hanging ours 42 days total.
If you see any signs of mold, immediately wipe those areas off with vinegar: simply wet a paper towel with vinegar and wipe.
If you see any moisture beading on the surface, wipe that off too.
Do check on them regularly– like every other day. Because conditions are not controlled in a garage, you will have to be vigilant. Don't make the mistakes we did, which we outlined below.
5. Eat and Store
To enjoy the goose prosciutto, wipe off the lard and trim off hard, dried-out areas. Slice thinly and serve with your favorite cheeses, spreads and other cured meats. Wrap leftovers in plastic wrap and store in the refrigerator– it should last several months. If you don't plan on using the other breast right away, vacuum seal it.
Mistakes & Troubleshooting
Ah, mold. We took down the prosciutto to check at 20 days and things looked fine and dandy– not a speck of mold in sight. We cut off a slice and it tasted good, though not quite as "funky" and concentrated as we'd prefer in cured meat. So we decided to let it go another 10 days.Except that 10 days turned in 22 days. Between the holidays, work and deer season, our watchful eye became lax, and before I knew it, we allowed so much time to pass before we checked on the prosciutto again.
I took them down and saw eerily dark mold on one of the breasts. Could it be the dreaded black mold of death? Or is it just really, really dark green? My stomach sank, and I wondered if my patience and precious meat had been wasted. I kept thinking that if I had just checked on them sooner, then I would've been able to catch the mold in it's earlier stages and wiped it off. It wouldn't have been a big deal. Too late now.
The larger piece was fine. Actually, it was delicious; 42 days resulted in good texture and flavor– still succulent with the right amount of funk. The saltiness was spot on, thanks to Hank's concise measurements.
But what about the smaller breast?

I scoured the internet for information, hoping to find insight from people who might've dealt with a similar situation. I kept reading the following from those in the "better-safe-than-sorry" and "it's-not-worth-it" camp:
white mold= good
green mold= okay
black mold = bad
Then there were the brave naysayers, a handful of "experts" whose advice was to scrub those areas with vinegar and/or cut them off. They've eaten cured meats like that with little trouble.
I contacted Chad at Cure, who replied:
"Doesn't look bad to me. Hard to tell everything from a photo. Smell is a big part of examining dried meats. If you're nervous at all you can make a thick paste of coarse salt and and a little bit of vinegar. Use that to scrub any spots you are worried about."
The mold didn't look slimy, nor hairy. To my nose, neither of the breasts emitted any "off" odors– no rot, sourness nor mustiness. They smelled like good prosciutto.
Whose advice to follow?
The intelligent person, who valued life and limb, would've stop right there and threw that sh*t away. As a food writer/blogger, I do feel the responsibility to tell our readers that "when in doubt, throw it out." And that's my official advice to you. If you see mold like that growing on your prosciutto, throw it out. Save yourselves!
But unofficially... for myself... I'm going to remain cautiously curious. I want to see what the meat looks like underneath. Here was my thought process:
The mold seemed only prevalent on areas covered with lard. The skin side of both breasts showed no traces of mold, at least to the naked eye. The lard was not cured, suggesting that the mold only affected uncured areas. Cured areas are more inhospitable to mold. Therefore if the mold tried to penetrate the cured meat underneath the lard, how successful could it be?

Following Chad's advice, I made a scrub with 1/4 cup of coarse kosher salt and 1 tablespoon of red wine vinegar.

I could've skipped the scrub on the bigger breast, but I did it just in case.

As I had hoped, the flesh underneath showed no signs of damage, as you can see in the photo below to the right. (Darker-looking areas are just places where the meat dried out more.)

So what does one do with this information? How invisible can mold appear once it has penetrated below the surface of a dryer, less porous food such as cured meat?
We've been enjoying the bigger breast, but the small one, I've vacuum sealed. I don't know what I'll do with it yet. Foolhardiness and cabin fever might compel me to try a piece this winter, in which case I'll provide an update.
If I die, this blog will become awfully quiet, and then you'll know.
Or maybe I'll just end up throwing it away. Maybe it's best to be safe than sorry.
Any charcuterie experts reading? Talk me off this ledge.
Comments
Post a Comment
Feel free to post any questions or comments.